Camping is the perfect opportunity to reconnect with nature, relax, and explore your creative side. Whether you’re traveling solo, with family, or as part of a group, incorporating art activities into your camping trip(in addition to essential camping gear) can make the experience even more memorable.
There are countless ways to bring out your inner artist while enjoying the great outdoors. These activities can range from painting serene landscapes to crafting with natural materials. Don’t worry if you are confused about deciding what art activities to try out while camping because we’ve got you covered with this article.
In this article, we have discussed the best 10 fun and engaging camping art activities to try in 2025 that are perfect for campers of all ages and skill levels. Therefore, we invite you to read on and add some of them to your camping adventure to make it more enjoyable.
Let’s dive into the list and get inspired without further ado!
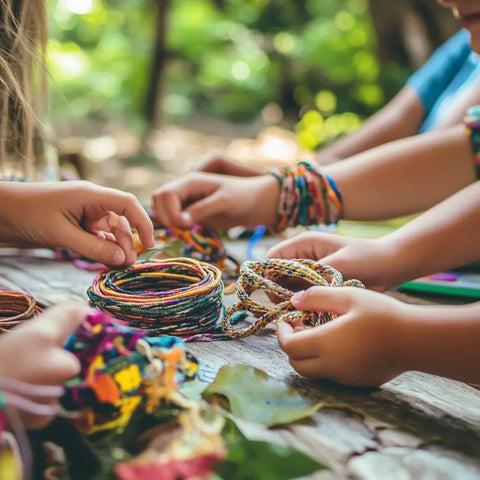
1. Handprint Campfire
The handprint campfire activity is a fun and creative way to commemorate your camping trip while engaging in a hands-on art project. This activity is ideal for kids and adults alike, offering a keepsake that captures the cozy spirit of sitting around the campfire.
Furthermore, the finished piece can serve as a unique memento of your outdoor adventure.
Materials Needed:
-
Paint (red, orange, and brown).
-
White paper or cardstock.
-
Sponge applicators or paintbrushes.
Instructions:
-
Prepare Your Materials: Lay out the paints, white paper, and sponge applicators on a flat surface. Ensure everyone participating has easy access to the supplies.
-
Create the Fire Base: Use a sponge applicator to paint a semi-circle at the bottom of the paper with brown paint. This will serve as the campfire logs.
-
Paint Your Hands: Dip your hands into the red paint first. Press your hand firmly onto the paper above the logs to represent the flames. Repeat with orange paint, overlapping the red handprint slightly to add dimension.
-
Add Details: Use smaller sponges or brushes to touch up the flames, blending the colors for a realistic look.
-
Let It Dry: Allow the paint to dry completely before handling the artwork.
-
Optional Personalization: Write your name, date, or the location of your camping trip at the bottom to make it even more special.
This simple yet meaningful activity will leave you with a cherished piece of art that symbolizes the warmth and joy of camping.
2. DIY Camping Lanterns
DIY camping lanterns are a delightful and practical art activity that adds charm and functionality to your camping experience. Not only are these lanterns fun to create, but they also serve as a gentle light source for your campsite at night. This activity encourages creativity and resourcefulness, making it perfect for campers of all ages.
Materials Needed:
-
Clear plastic bottles (clean and empty).
-
Tissue paper (various colors).
-
Glow sticks or battery-operated electric candles.
-
Pipe cleaners.
-
Glue or Mod Podge.
-
Paintbrush.
-
Scissors.
Instructions:
-
Prepare the Bottle: Cut the top off the plastic bottle if needed, creating a straight edge. Keep the bottle open to easily place the light source inside later.
-
Decorate the Bottle: Tear tissue paper into small pieces. Use a paintbrush to apply a thin layer of glue or Mod Podge to the outside of the bottle. Attach the tissue paper pieces in any pattern or color combination you like, overlapping them slightly for a stained-glass effect. Let it dry.
-
Create a Handle: Twist a pipe cleaner around the top edge of the bottle to create a secure rim. Then, attach another pipe cleaner to form a loop for carrying or hanging the lantern.
-
Add the Light Source: Activate a glow stick or turn on the electric candle and place it inside the bottle. Avoid using open flames for safety.
-
Enjoy the Glow: Hang the lantern on a nearby branch, set it on a table, or carry it around the campsite for a magical nighttime ambiance.
This activity not only sparks creativity but also provides a reusable light source that enhances the coziness of your camping experience.
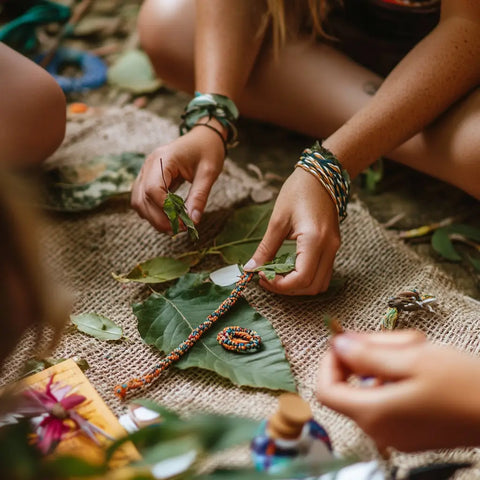
3. Nature Bracelets
Nature bracelets are a beautiful and interactive way to immerse yourself in the environment around you. This activity combines art and exploration, as you gather natural materials to create a one-of-a-kind, wearable craft. It’s a simple yet rewarding project that’s perfect for campers of all ages, encouraging creativity while appreciating nature’s beauty.
Materials Needed:
-
Strips of cardstock (wide enough to fit as a bracelet).
-
Double-sided tape.
-
Natural items like flowers, leaves, small twigs, or moss (collected responsibly from your surroundings).
Instructions:
-
Prepare the Bracelet Base: Cut strips of cardstock long enough to wrap around your wrist. Apply double-sided tape to one side of the strip, ensuring the entire surface is sticky.
-
Collect Natural Materials: Explore your campsite to gather small natural items. Choose colorful or textured elements like petals, small leaves, or interesting seeds. Avoid picking anything harmful or protected.
-
Decorate the Bracelet: Press the natural items onto the sticky side of the tape. Arrange them creatively to form patterns or layers for a textured look.
-
Secure the Bracelet: Once decorated, wrap the bracelet around your wrist and secure it by overlapping the ends of the cardstock or using a small piece of tape.
-
Show Off Your Creation: Wear your nature bracelet proudly or create several to share with friends and family.
This eco-friendly craft not only results in a stunning accessory but also fosters a deeper connection to the natural world during your camping adventure.
4. Painted Kindness Rocks
Painted kindness rocks are a heartfelt way to spread positivity and joy during your camping trip. This activity encourages creativity and kindness as you decorate rocks with vibrant designs and uplifting messages.
Once completed, these rocks can be left around the campsite or along trails for others to discover, creating moments of surprise and inspiration.
Materials Needed:
-
Smooth rocks (collected or purchased).
-
Craft paint (variety of colors).
-
Paintbrushes (small and medium sizes).
-
Waterproof sealant (optional, for durability).
Instructions:
-
Prepare the Rocks: Clean the rocks to remove any dirt or debris, ensuring a smooth surface for painting. Let them dry completely before starting.
-
Paint a Base Layer: Apply a solid base color to the rock if desired, and let it dry. This helps the design and message stand out more vividly.
-
Add Your Design: Use smaller brushes to paint patterns, symbols, or positive words like “Hope,” “Smile,” or “Be Kind.” Let your creativity shine!
-
Seal Your Artwork: Once the paint is completely dry, you can apply a waterproof sealant to protect your designs from the elements. This step is optional but recommended for longevity.
-
Spread Kindness: Place the finished rocks around the campsite, near trails, or by gathering areas for others to find and enjoy.
This thoughtful activity combines creativity with a touch of generosity, leaving a lasting impression not just on the rocks but on the hearts of fellow campers who find them.
5. Toilet Paper Roll Binoculars
Toilet paper roll binoculars are a fun and eco-friendly craft activity that doubles as a tool for exploring nature. Perfect for kids and the young at heart, this project uses simple materials to create binoculars that can be used for bird watching, spotting wildlife, or just enhancing your outdoor adventures.
Materials Needed:
-
Two empty toilet paper rolls.
-
Yarn or string (for a strap).
-
Colored tape or decorative paper.
-
Glue or a stapler.
-
Hole punch.
Instructions:
-
Prepare the Rolls: Take two clean, empty toilet paper rolls. These will form the "lenses" of the binoculars.
-
Decorate the Rolls: Use colored tape, stickers, or decorative paper to wrap and decorate the rolls. Let the kids personalize their binoculars with fun designs or patterns.
-
Assemble the Binoculars: Glue or staple the two rolls together side by side. Ensure they are securely attached.
-
Add a Strap: Punch a hole on the outer edge of each roll. Thread a piece of yarn or string through the holes and tie knots to create a strap. Adjust the length so it’s comfortable to wear around the neck.
-
Use Your Binoculars: Once completed, head out into nature and use the binoculars to spot birds, insects, or interesting landmarks.
This simple and creative activity not only keeps kids engaged but also encourages them to observe and connect with the natural world around them.
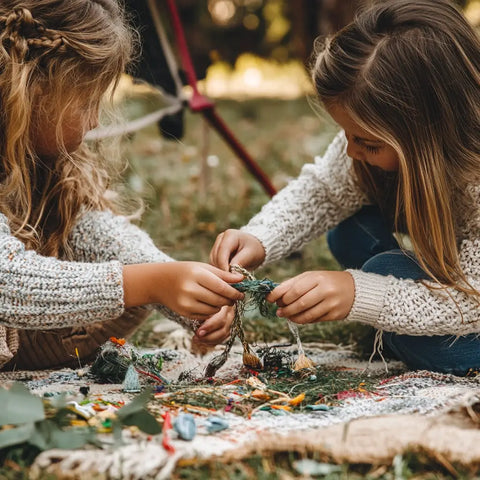
6. Dream Catchers
Crafting dream catchers is a meaningful activity rooted in tradition, offering a unique blend of creativity and cultural appreciation. This project allows campers to create a personal keepsake using simple materials while connecting with the natural environment. Dream catchers are not only beautiful but also serve as a symbolic decoration, believed to capture bad dreams and allow only positive ones to pass through.
Materials Needed:
-
Embroidery hoops (or flexible natural branches to form a hoop).
-
String or yarn (neutral or colorful).
-
Beads (various sizes and colors).
-
Feathers (optional).
-
Scissors.
Instructions:
-
Create the Hoop: If using natural materials, bend a flexible branch into a circle and secure the ends. Otherwise, use an embroidery hoop as your base.
-
Weave the Web: Tie one end of the string or yarn to the hoop. Begin wrapping and looping the string across the hoop to form a web-like pattern. You can add beads to the string as you weave to enhance the design.
-
Secure the Web: Once the web is complete, tie off the string securely to the hoop. Trim any excess string.
-
Decorate the Dream Catcher: Attach additional beads or feathers to hanging strings tied to the bottom of the hoop. This adds a whimsical touch and movement to your dream catcher.
-
Display Your Creation: Hang your dream catcher in your tent, on a tree branch, or take it home as a special memento of your camping trip.
This calming and creative activity is a wonderful way to pass the time and produce a handmade treasure inspired by nature and tradition.
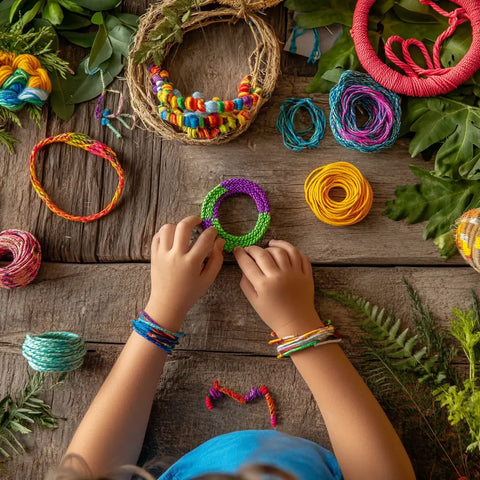
7. S'mores Cut and Paste Craft
S’mores cut and paste crafts bring the fun of this classic camping treat into an engaging and mess-free activity. Perfect for younger campers, this craft allows kids to use their creativity while learning about the delicious layers that make up a s’more. It’s a playful and educational project that adds a dash of sweetness to your camping adventure.
Materials Needed:
-
Printable templates for s’mores components (graham crackers, marshmallows, chocolate squares).
-
Scissors.
-
Glue sticks.
-
Colored markers or crayons (optional, for personalization).
-
Construction paper (as a base).
Instructions:
-
Print the Templates: Use printable templates to provide pre-drawn shapes of the s’mores components. These can be found online or drawn by hand.
-
Cut Out the Pieces: Have kids carefully cut out the graham crackers, marshmallows, and chocolate squares from the template.
-
Assemble the S’more: Glue the components onto a piece of construction paper in the correct order: graham cracker on the bottom, chocolate square next, marshmallow in the middle, and another graham cracker on top.
-
Personalize the Craft: Let the kids decorate their s’more with crayons or markers, adding creative touches like smiley faces on the marshmallows or colorful patterns on the graham crackers.
-
Showcase the Creations: Display the finished s’mores crafts around the campsite or inside your tent to add a festive touch to your camping trip.
This fun and simple activity keeps kids entertained while celebrating a beloved camping tradition, and no sticky fingers are required!
8. Foil Painted Campfire Craft
The foil-painted campfire craft is a creative activity that combines art and tactile exploration. Using aluminum foil as the painting surface, this craft allows campers to create a textured and vibrant campfire scene. It’s perfect for kids and adults who want to add an artistic touch to their camping trip and take home a colorful keepsake.
Materials Needed:
-
Aluminum foil (cut into a square or rectangle).
-
Acrylic paints (red, orange, yellow, brown).
-
Paintbrushes or sponge brushes.
-
Cardstock or cardboard (to mount the foil).
-
Glue or tape.
Instructions:
-
Prepare the Foil Canvas: Cut a piece of aluminum foil to your desired size and glue or tape it onto a piece of cardstock or cardboard for stability.
-
Paint the Campfire Logs: Start by painting the base of the scene with brown paint to create the logs. Use horizontal brushstrokes to mimic the texture of wood.
-
Add the Flames: Use red, orange, and yellow paints to create flames above the logs. Apply the paint with sponge brushes or your fingers to blend the colors and add a dynamic, fiery effect.
-
Enhance the Texture: The foil’s reflective surface adds a natural glow to the campfire. You can press and lift the brush or use the edge of the brush to create additional texture.
-
Let It Dry: Allow the paint to dry completely before displaying your artwork.
-
Optional Frame: Mount your finished campfire scene in a simple frame for a polished look, or pin it up as-is for a rustic vibe.
This craft is a fun and sensory-rich way to recreate the warmth and glow of a campfire while embracing your artistic side.
9. Story Stones
Story stones are a fantastic way to inspire creativity and imagination while camping. By decorating small stones with images or symbols, you create a set of storytelling tools that can be used to tell endless tales around the campfire.
Furthermore, this craft is not only fun but also promotes language development and imaginative play, making it a perfect activity for campers of all ages.
Materials Needed:
-
Small smooth stones (preferably flat).
-
Markers or paint.
-
Paintbrushes (if using paint).
-
Clear varnish or sealant (optional, for durability).
Instructions:
-
Prepare the Stones: Clean and dry the stones to ensure the paint or markers adhere well.
-
Choose Your Symbols: Decide on a set of images or symbols to represent different parts of a story (e.g., a sun, moon, tree, animal, person, house, etc.). You can either draw these images by hand with markers or paint them on using small brushes.
-
Decorate the Stones: Use the markers or paint to add the images to each stone. Be creative with your designs, and feel free to add colors and details to make each stone unique.
-
Allow to Dry: If you’re using paint, let the stones dry completely. For extra durability, you can apply a clear varnish or sealant over the painted stones to protect the designs.
-
Use the Stones for Storytelling: Once your story stones are ready, gather around the campfire and use the stones to create a story. Each person can take turns drawing a stone and incorporating its image into the narrative. Let your imagination guide the tale!
Story stones are an interactive way to build storytelling skills and enjoy endless creative adventures while camping. It’s a perfect group activity that sparks laughter and creativity in everyone!
10. Clothespin Dolls
Clothespin dolls are a simple yet delightful craft that combines creativity with play. This activity allows campers to create their own miniature dolls using basic materials, which can then be used for imaginative play. It’s a fun way to spend time crafting and then enjoy the fruits of your labor in playtime, making it a perfect activity for kids and adults alike.
Materials Needed:
-
Wooden clothespins.
-
Embroidery floss (for hair).
-
Markers (for facial features and clothing).
-
Scrap fabric or felt (optional, for clothing).
-
Glue (for attaching fabric and accessories).
Instructions:
-
Prepare the Clothespin: Start by holding the clothespin with the rounded end at the top, which will become the head of the doll.
-
Create the Hair: Cut a length of embroidery floss to the desired hair length. Wrap the floss around the top of the clothespin several times, leaving enough extra at the top to tie off. Trim the floss to create a neat hairstyle.
-
Draw the Face: Use markers to draw a simple face on the rounded end of the clothespin. Add eyes, a nose, and a smile to give your doll personality.
-
Make the Clothes: Cut small pieces of fabric or felt to fit the body of the clothespin, and glue them onto the doll. You can make dresses, shirts, or pants using the fabric.
-
Add Accessories (Optional): If desired, you can also add small buttons, ribbons, or beads to enhance your doll's appearance.
-
Play with Your Doll: Once your doll is complete, use it for imaginative play. You can create stories, scenarios, or even put on a little puppet show with your newly crafted clothespin dolls.
Clothespin dolls are a timeless craft that offers both a creative outlet and an opportunity for interactive fun. They make a great keepsake from your camping trip, as well as a playful companion for future adventures.
Essential Tips for Successful Camping Art Sessions
To ensure your artistic endeavors succeed while enjoying the great outdoors, here are some essential tips to keep your craft sessions enjoyable, organized, and environmentally friendly:
1. Weather Protection
-
Bring Waterproof Containers for Supplies: Keep your art materials dry and protected from rain or moisture by packing them in waterproof containers or ziplock bags.
-
Create a Tarp Shelter for Art Activities: Set up a tarp or canopy shelter to protect both your artwork and materials from unexpected weather conditions, like rain or intense sun.
-
Have Indoor Backup Plans Ready: In case of bad weather, ensure you have a backup indoor space like a tent or vehicle to continue your craft session without interruption.
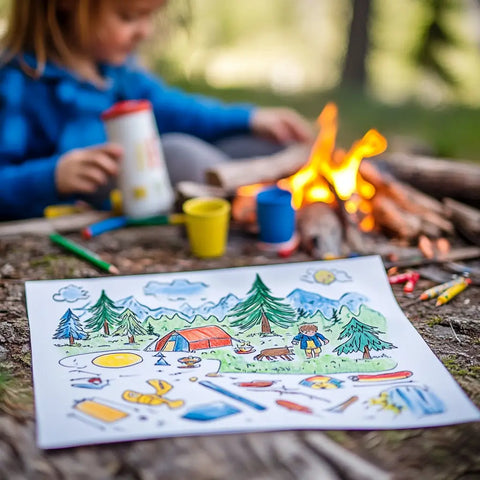
2. Environmental Responsibility
-
Use Biodegradable Materials: Opt for eco-friendly, biodegradable materials for your projects to reduce environmental impact, such as natural fibers and water-based paints.
-
Practice "Leave No Trace" Principles: Always clean up your workspace thoroughly, leaving no evidence of your activities behind. This ensures the natural surroundings remain pristine for future campers.
-
Avoid Disturbing Living Plants: Be mindful of your surroundings and avoid using living plants or flowers in your crafts unless they have naturally fallen to the ground. Preserve the local flora and fauna.
3. Supply Organization
-
Pack Supplies in Clear, Labeled Containers: Keeping your supplies organized in clear, labeled containers will help you quickly find what you need without making a mess.
-
Bring Versatile Materials That Serve Multiple Purposes: Choose materials that can be used for various crafts(such as markers, scissors, and string) to maximize the space and weight in your pack.
-
Include Basic Cleaning Supplies: Don’t forget to bring wipes, paper towels, or a small cleaning kit to keep your work area tidy and to clean your hands after a messy session.
By considering these tips, you can ensure that your camping art activities are enjoyable, organized, and respectful to the environment, allowing for a creative and memorable outdoor experience!
Where to Buy the Best Camping Gear for Your Outdoor Adventures in 2025
Ready to elevate your camping experience with top-quality gear? At Camp Supreme, we offer an extensive selection of essential and innovative products designed to enhance your outdoor adventures, from durable tents to comfortable camping furniture and everything in between.
Here’s why Camp Supreme is your premier destination for camping gear:
-
Quality Assurance: Our products are meticulously selected to meet the highest standards of safety and durability, ensuring you have reliable gear that stands up to the elements and lasts for years to come.
-
Wide Selection: We provide a diverse range of categories including Camping Furniture, Tents, Cooking & Food Supplies, Car Tents, Clothing & Footwear, Backpacking Essentials, Navigational & Survival Accessories, Outdoor Tools & Safety Gear, Sleeping Bags, and Water Gear. Whatever you need for your next adventure, we have you covered.
-
Competitive Pricing: Enjoy exceptional value with our affordable prices, making it easy to gear up for your camping trips without stretching your budget.
-
Customer Satisfaction: Our dedicated team is committed to providing outstanding customer service, helping you choose the perfect products for your outdoor needs and offering guidance when needed.
Therefore, we invite you to explore our range of camping gear today. Click below to visit our store and discover the perfect items for your next outdoor adventure!
Final thoughts
Incorporating art activities into your camping trip is a great way to enhance your outdoor experience. Whether you're crafting with nature or creating something practical like lanterns or binoculars, these projects allow you to connect with the environment in a creative and meaningful way.
From painting handprint campfires to making dream catchers, there’s something for everyone, regardless of age or skill level. These activities not only offer fun but they also help you create lasting memories and mementos of your time in nature.
So, grab your supplies, get creative, and enjoy the beauty of camping through art in 2025!
Key Takeaways
-
Creative Camping: Incorporating art activities into your camping trip can enhance your outdoor experience and make it more memorable.
-
Handprint Campfire: A fun and hands-on activity where participants create a campfire using handprints, perfect for kids and adults as a keepsake.
-
DIY Camping Lanterns: Crafting lanterns from plastic bottles and tissue paper not only sparks creativity but also provides a useful light source for your campsite.
-
Nature Bracelets: A simple craft where you collect natural materials like leaves and flowers to decorate a bracelet, fostering a deeper connection with nature.
-
Painted Kindness Rocks: An activity where campers decorate rocks with positive messages, which can be left around the campsite to spread joy.
-
Toilet Paper Roll Binoculars: An eco-friendly craft that encourages exploration of nature, especially fun for kids, by making binoculars from simple materials.
-
Dream Catchers: Create a personal and meaningful keepsake using string, beads, and feathers, while also connecting with cultural traditions.
-
S'mores Cut and Paste Craft: A creative, mess-free craft that lets kids learn about s’mores while decorating cut-out components of the treat.
-
Foil Painted Campfire Craft: Use aluminum foil and paint to create a textured campfire scene, perfect for artistic expression and a tactile experience.
-
Story Stones: Decorate small stones with symbols to inspire storytelling, promoting creativity and language development for campers of all ages.
FAQs
What art supplies are essential for camping?
Basic supplies should include waterproof paper, colored pencils, water-resistant markers, and eco-friendly paints. Don't forget collecting bags for natural materials.
How can I protect artwork created while camping?
Bring a sturdy portfolio or large ziplock bags to store finished pieces. Consider taking photos of larger installations that can't be transported.
Are these activities suitable for young children?
Most activities can be adapted for different age groups. Supervise young children when collecting materials and using art supplies.
